Showing posts with label your. Show all posts

Sunday, April 9, 2017

The Only Way To Browse Free On Your MTN SIM

The Only Way To Browse Free On Your MTN SIM


Do you want to browse free without any restriction on your mtn line? you dont need to suffer your self  other than  having Seventy Naira on Your MTN Line, for the past six months i have been enjoying this offer , just follow the steps below on how to setup your free browsing with MTN SIM..
free-browsing-on-mtn-sim

Step 1:
Goto Settings On Your Android phone and Locate Apn (Access Point Name ), and add
Proxy : 10.199.212.2
port: 8080 and then save.

Step 2:
Download Psiphon Handler >> HERE (3mb)<<
Install and launch  launch Psiphon Handler and then goto handler menu and change
PROXY TYPE to Real Host in the drop down options
locate Proxy Server in the Handler menu and add:
"web.blackberry.com" as proxy sever without quote eg. web.blackberry.com then save and continue.

Step 3:
Still in the Psiphon handler Tick "tunnel Whole device"

Step 4:
Go to options tab in psiphon handler and locate "More Options", Next is for you to tick "connect through HTTP Proxy, then also thick "use the following settings" and the following:
Proxy: 10.199.212.2
Port:    8080.

Step 5:
Load NGN100 recharge card  then dial *216*3*1#, NGN70 will be deducted, after a confirmation message  stating that "Welcome to the BB10 daily subscription...etc" , launch and start psiphon handler to connect and start browsing unlimited without any restrictions for 24 hours.


Available link for download

Read more »

Thursday, April 6, 2017

Activate Your MTN Sim Card For 4G LTE Services

Activate Your MTN Sim Card For 4G LTE Services


MTN NG is the first among other network providers to launch its commercial 4G LTE Service, not just that but they have  made their  4G LTE service available for all states in Nigeria. Following the acquisition of Visafone by the network provider earlier in 2016.


Activate Your MTN Sim Card For 4G LTE Services


MTN 4G LTE only available in selected states before, it is now available in all states. To use MTN 4G data plan, you must be using a compatible phone and must have swapped your sim for MTN 4G sim card from any MTN office nearest to you before you can be part of MTN 4G evolution.

To make things simple, MTN Nigeria makes available a short message code that can be easily used to confirm if your smartphone is compatible. If compatible, you can then go to a nearest MTN office and swapped your sim for MTN 4G sim card.

To Check if Your Smartphone is Compatible with MTN 4G Service
Your phone must be 4G enabled. If not, don’t bother.


  • Simply text 4G to 131.
  • If your smartphone is compatible, you will receive a message that; Yello! Your device is 4G ready but you need to upgrade your SIM to enjoy MTN 4G LTE. Please visit the nearest MTN store or partner retailer for a sim swap now.
  • If your phone is not compatible, you will receive a message that; Yello! You need to upgrade your SIM card and device to enjoy MTN 4G LTE. Please visit the nearest MTN store or partner retailer to upgrade now.
  • If your Smartphone is compatible, visit the nearest MTN office and swapped your sim for MTN 4G sim card.


MTN 4G Data Plans and How to Subscribe
If you have confirmed your smartphone that its compatible with MTN 4G network and you have swapped to MTN 4G compatible sim. Dial *444# to check and choose MTN 4G data plan suitable for you. Below are some of their available data plans.

  • 100MB for N500 (Valid for 7 days).
  • 150MB for N499 (Valid for 24 hours).
  • 200MB for N1000 (Valid for 30 days).
  • Unlimited data for N36,999 (Valid for 30 days).
  • 42GB for N66499 (Valid for 12 Months).
  • 10GB for N6000 (Valid for 30 days).
  • 15GB for N10,000 (Valid for 30 days).

If you are using the MTN 4G service, can you please tell us your view about the speed of their 4G network. 

Available link for download

Read more »

Monday, March 20, 2017

Activate Your Glo Sim Card For 4G LTE Network

Activate Your Glo Sim Card For 4G LTE Network


With the assist of the post about Glo 4G LTE Service published at the day before today, By now you must have recognised if Glo 4G LTE Services available for your vicinity and i assumed that we are all thrilled with the statement because of the fact that we will nonetheless be able to flex with glos cheap and low-priced  Internet data bundles as all their plans works with the 4G LTE. 


The next step is to activate your SIM or mobile phone for Glo 4G network, which is similar to the way MTN 4G is activated. 

To Activate Glo 4G LTE Nework 


  • First of all, make sure you have a 4G LTE enabled device.
  • Then, go to the nearby Glo office and buy a new 4G LTE SIM, get it registered or simply swap your normal Glo sim for a 4G LTE sim.
  • Once it has been successfully swapped, dial *777# to get any of the 4G available plans.

The Glo 4G LTE sim will work on Glo 4G router or any Universal MiFi available to you, but it will not work on a normal 3G Modem. You can also connect your 4G enabled smartphone via hotspot to your PC.

Glo has made it easier for you to know if your phone is compatible with their 4G LTE network, just text 4G to 400 and youll receive a message telling you if its compatible or not.


Available link for download

Read more »

Thursday, March 16, 2017

PhotoWall Live Wallpaper Get stunned along with your android

PhotoWall Live Wallpaper Get stunned along with your android


PhotoWall Live Wallpaper : Get stunned along with your android


PhotoWall Live Wallpaper : Get stunned along with your android

PhotoWall Live Wallpaper 


PhotoWall shows your photos as your wallpaper! See an ever ever-changing set of photos from:
Dont you prefer to stay your treasured ones near you? And once you are set at work one among the simplest ways that to feel connected is to own a family portrait as your phones wallpaper. Its one among those easy things that helps keep plenty people sane through the torrid and hard operating day.


Photowall Live Wallpaper takes this idea to following level. instead of having only one image to watch, it at random shuffles photos to confirm you get slightly of selection.


PhotoWall shows your photos as your wallpaper! See an ever ever-changing set of photos from:

    Your phones camera gallery
    Your own Facebook photos
    Your friends Facebook photos
    Facebook photos labelled as having you in them

PhotoWall Live Wallpaper Get stunned along with your Android1PhotoWall Live Wallpaper Get stunned along with your Android2


Its totally free and ad free!

This version shows your photos as a pile of Polaroids. youll upgrade to unlock a lot of layouts and to urge a lot of photos a lot of usually. simply explore for PhotoWall Upgrade, otherwise you will make out from inside this app.


Watch The Video Below


The app grabs pictures from your phones gallery and scatters them round the screen like discarded Polaroids. It even adds a granular result to every image to simulate the passage of your time, like those photos are mammary gland out of a long-forgotten shoebox from to a lower place your bed. it is a cool result that produces the wallpaper stand out.

As well as connecting to your phones internal gallery, Photowall Live Wallpaper additionally options the chance to link to along with your Facebook account. youll have pictures from your Facebook album seem, furthermore as pictures taken by your friends during which youre labelled.

PhotoWall Live Wallpaper Get stunned along with your Android3PhotoWall Live Wallpaper Get stunned along with your Android2

A bit of caution is presumably needed here, as a number of your mates could have labelled you in whole unrelated photos for his or her own twisted amusement. it is also price noting, within the method of connecting to your Facebook account, the app is accruing information charges and intense a lot of battery power.

Photowall Live Paper is being distributed freed from charge, however with some notable caveats. The free version solely permits you to use the Polaroid-style layout, whereas the paid-for upgrade offers a lot of choices. youll have all of the pictures organized on a wall, or have them displayed in numerous sizes mistreatment the Puzzle selection. the ultimate possibility is Fade, that blends pictures along. To be honest, the plastic film layout is that the best, though the flip result on the Wall arrangement is quite winning.


The paid-for update additionally offers the power to feature effects to every image, like sepia tone or a a lot of vivid color balance and distinction. The differences between the free and paid-for editions of the app are less hanging than you may assume, and also the biggest reason at hand over your money is to get rid of the occasional Upgrade now pictures that seem randomly intervals in your icon stream.

What Photowall Live Wallpaper sets dead set accomplish, it will thus with commendable poise. Everything works because it ought to, and also the cool plastic film result extremely makes your cherished snaps stand out. the most important point of the app is that it frees your pictures from the insult of being latched away in your phones gallery app, and places them on full show for you et al. to fancy.

If you are the quite one that has Associate in Nursing American state card filled with family photos, then this might be your good live wallpaper.

Available link for download

Read more »

Wednesday, March 15, 2017

GET YOUR OWN AIRTEL FREE 5GB AND 30GB TODAY!

GET YOUR OWN AIRTEL FREE 5GB AND 30GB TODAY!


Airtel are sharing free 5gb and 30gb when you purchase their dongle and MIFI or ROUTER

Get 5GB data free for 30 days when you buy the Airtel Dongle, also get free 30GB Data for 60days when you buy the Airtel Mifi or Router.
Visit the nearest AIRTEL SHOWROOMS NATION-WIDE to purchase yours.

POSSIBLE AMOUNT OF THE DONGLE AND MIFI/ROUTER.

Free 5GB Data

Dongle

N7,000

Free 30GB Data

Mifi

N20,000

Router

Free 30GB Data


N25,000


5GB


 SEE ALSO: AIRTEL NEW YEAR LATEST WORKING FREE CHEAT  

HOW TO ACTIVATE THE FREE BUNDLE ON PURCHASE OF AIRTEL DATA TERMINAL

  1. Open Data Terminal & Insert SIM, ensure KYC has been completed prior
  2. Connect Data Terminal to a laptop and open web browser
  3. Connect to http://192.168.8.1/
  4. Enter Username and password
  5. Click the SMS Tab
  6. Enter 232 in the recipient Number
  7. Enter “internet” in the body of the text
  8. Send SMS
  9. Enter 141 in the recipient Number
  10. Enter “Join” in the body of the text
  11.  Send the sms.......

And VIOLA ..........Your data is smiling at you........

Available link for download

Read more »

Sunday, March 5, 2017

Check Call History of your SIM of any network

Check Call History of your SIM of any network


Check Call History of your SIM of any network


mein app k liye ufone,telenor,zong or warid ki call history maloom karny ki websites lay kar aya hon

is websites sy app karna ye hai k in websites par registered hona hai is k liye app jis no. ki registration karen gy us ka activation code app k mobile par aaye ga wo app ko verfication code ki jaga likhna hai or phir app registered ho jain gay


For Mobilink user 
 Click Here


For telenor user

For account activity 
 
Click Here


Telenor user can also get call history from telenor office in rupees 100

For zong user

 
Click Here to check


For ufone user

 Click Here

for warid user

 
Click Here

 
Tweets by @ihkanwal

Available link for download

Read more »

Sunday, February 26, 2017

How To Check Your MTN Airtel Glo and Etisalat Phone Number With Short Code

How To Check Your MTN Airtel Glo and Etisalat Phone Number With Short Code


How to check your MTN, Airtel, Glo and Etisalat Phone Number With Short Code

So many people feel embarrassed when theyre asked of there phone number, because they dont have it by heart and I dont know how to go about it. Well, i will show you in this post how to check, MTN, Airtel, Glo and Etisalat Phone Number With Short Code. Many of us forget our number especially when is a newly purchased Sim card, read on below to see how to check it when youve forgotten it.

All networks are assigned specific prefix for their subscribers, in this post you will also find out which network someone is using to call you by looking at the first four digits (starting with 0).

You may have known of 0803 for MTN, 0802 for Airtel, 0809 (9ja lol) for Etisalat and 0805 for Glo, how about 0709, and others? Read on.


HOW TO CHECK YOUR PHONE NUMBER ON MTN, ETISALAT, GLO, AIRTEL

1) MTN
Dial *663# or Dial *123# and follow onscreen process that follows.

2) ETISALAT
Simply dial *248# and your number will be displayed.

3) AIRTEL
To check and know your mobile phone number on Airtel, dial *121#
Follow the onscreen instruction.

4) GLO
Dial *135*8# on your Glo enabled phone and your number displays on your screen.


List of all network phone number prefix in Nigeria

MTN Phone Numbers

0803xxxxxxx
0806xxxxxxx
0810xxxxxxx
0813xxxxxxx
0814xxxxxxx
0816xxxxxxx
0703xxxxxxx
0706xxxxxxx
0903xxxxxxx

AIRTEL Phone Numbers

0802xxxxxxx
0808xxxxxxx
0812xxxxxxx
0708xxxxxxx
0902xxxxxxx

ETISALAT Phone Numbers

0809xxxxxxx
0817xxxxxxx
0818xxxxxxx
0908xxxxxxx
0909xxxxxxx


GLO Phone Numbers

0805xxxxxxx
0807xxxxxxx
0811xxxxxxx
0815xxxxxxx
0705xxxxxxx
0905xxxxxxx


MULTILINKS Phone Number

0709xxxxxxx

NTEL Phone Number

0804xxxxxxx

Available link for download

Read more »

Best Android Launcher Apps To Customize Your Smartphone

Best Android Launcher Apps To Customize Your Smartphone


One of the best features of Android is the ability to transform or customize almost anything from the looks of the operating system down to the very last pixel with the help of this post on Best Android Launcher Apps To Customize Your Smartphone you can do more.

best Android Launcher Apps To Customize Your Smartphone

If you are tired of staring at the same old screen or icons on your Android home screen try consider changing it by installing a custom Android launcher. A good launcher can give your phone a total makeover, from changing the look and feel with different icons and themes, to adding new functionality such as smart folders. Read on for the Best Android Launcher Apps.

Some of us always wants extraordinary look for our smartphone irrespective of the hardware features, we still wants to customize our phone like changing screen transitions, icons, and fonts, but the best Android launchers out there enable users to tweak the device’s behavior to suit their daily usage, so long as you are willing to put the time into defining those customizations it will gives your smartphone good, sweet and beautiful look. If you were looking to customize android home screen, you can get too many launchers to tweak the UI. To make things easier, we are listing here some of the Best Android Launcher apps for customization

BEST ANDROID LAUNCHER APPS

NOVA LAUNCHER

Nova Launcher is one of the most popular and among the best modern Android launcher apps with material design. Nova Launcher replaces your home screen with one you control and can customize. Developed by the TeslaCoil software fast, Nova Launcher is sleek and highly customizable. Nova has dozens of features packed for the optimum performance makes it premium. It includes three folders labeled Google, Create and Play, a Google Search Bar and a Gmail widget on the left home screen. There are a lot of options to work through, from icon themes to icon packs, scrollable docks to app drawer customizations, folder settings and infinite scrolling.

nova Launcher

It comes features thousands of icon themes, it allows you to snap icons or widgets half way through the desktop grid cells. Easy color controls for labels, folders, unread badges, drawer tabs and backgrounds. You can customize App Drawer for custom tabs, Vertical or Horizontal scrolling and Custom effects. It also allow you to backup and restore your home screen layouts in the case you switch to a new phone. The best part is it gets regularly updated which means bugs generally get squished quickly. Nova Launcher is one of the best Android Launcher.


APEX LAUNCHER

Apex launcher is another outstanding launcher developed by Apex inc. It offers customizations options similar to Nova Launcher. Core features include the ability to customize the homescreen grid size and it has up to 9 homescreens options to chose. You can change the icon tray size and scrolling, change animations, adjust home screen behaviors, and customize gesture commands for various pinches, taps, and swipes. Ability to hide elements as you want to, options to choose different folder preview styles and background. And lots of other customization options.

Apex Launcher

It also comes with the ability to Backup/restore settings and data. Apex Launcher is optimized for both phones and tablets.  Apex Launcher is a feature-packed launcher with free and premium versions, but even the non-paid version offers a huge amount of customization options and doesn’t contain ads or bloatware apps.


GOOGLE NOW LAUNCHER

If you are looking for minimalist looks, Google Now is the answer. Google now is simple yet powerful android launcher which has Google Now integration. Google now is based on the pure android user interface, so in lacks some of the basic launchers customization feat.

Google Now Launcher

You can also use Google Now voice searching to find hidden files, or voice commands to complete everyday tasks such sending a text, controlling your music or looking up directions without ever touching your phone. Transitions are quick and clean, and there’s nothing superfluous getting between you and your apps and widgets. Just swipe right from your Home screen to see Google Now cards that bring you just the right information, at just the right time. It has a quick access to Search from every Home screen. It has  A-Z apps list, with fast scrolling and quick searching of apps on your device and the Play Store.


ZENUI LAUNCHER

ZenUI Launcher is new android launcher app developed by ZenUI, ASUS Computer Inc and has been Google Play’s top-ranked . The design is clean and speedy and offers a variety of useful features, like grouping apps into related folders automatically for you and recommending new apps you might like.  You can also get a sneak live preview on your screen when customizing your wallpapers, themes, fonts, and more.

zeniu Launcher

With ZenUI Launcher you can now more personalized and showcase your personality on your Android devices using a variety of free themes, free wallpapers, icons, effects and transitions. You can even set different wallpapers in home screen and lock screen to make it more fun and interesting. Not only themes, you can even customize the font style, font size, or icon size of your app and widgets on the home screen, lock screen, and all apps screen.  Just wwipe up the home screen to access the setting shortcuts to key features such as apps, widgets, wallpapers, icons, and system themes to customize your launcher easily


THEMER

Themer is unlike other launcher apps; instead of just skinning your icons and changing your system font, they wipe everything off of your home screen and put up their own interface and layout. Your choices range from simple and sedate to bright, bold and colorful, and since it only takes a couple taps to switch your entire look.

Themer Launcher

All the themes are fully customizable, or you can use them as they are. You don’t need any other third party apps, everything you need is included in each theme.  It’s powerful, has icon pack support, and is integrated with Zooper Widget. Over 400 premium themes available of  categories like Card UI, Nature, Space, Minimal, and many more. The app also let you receive advanced information about your battery, weather, system and more directly on your homescreen without any setup.


GO LAUNCHER

GO Launcher is another great and popular launcher app with over 200 million users worldwide. It has a stylish, smart, slim & personalized application for your Android phone. It is an upgraded version of “GO Launcher EX”, a new flat interface design with interactive control experience, enhance the performance and efficiency significantly.

GO Launcher comes with more than 10000 beautiful mobile themes for the users, professional designer create abundant themes for you every week with a variety of styles, users can enjoy the intelligent services by installing the theme of convenient and customized mobile user interface, enrich your mobile life. It has an independent developed 3D Engine, GO Launcher provides users with extremely fast and secure operating experience with simple, smooth and awesome animation effects.

Go Launcher

GO Launcher has more than 25 screen animation effects, over 15 free App Widget, more than 10000 specially designed theme. The latest version provides DIY Themer, using your own wallpapers, icons etc. to decorate the launcher, make it more stylish and more personalization. Another interesting feature is that it has the ability to Hide & Lock APPs to protect phone security. One demerit is that the traditional advertisement makes it a setback.

This all The Best Android Launcher Apps To Customize Your Smartphone,you can add your through the comment box.

Available link for download

Read more »

Friday, February 24, 2017

SanDisk Unveiled 1 Terabyte SD card That Holds More Data Than Your Laptop

SanDisk Unveiled 1 Terabyte SD card That Holds More Data Than Your Laptop


SanDisk today announced the world’s biggest SD card, which they claim is the first to pack 1 terabyte of storage.


1 Terabyte

The one Terabyte SD card is currently exists as a prototype, but will probably be released soon. There’s no pricing information revealed about the world first Terabyte SD card, but if the $345 cost of the 512 GB card is taken into account, it won’t be exactly cheap.. 
Here are what you can store on a 3.2 cm tall 1 Terabyte SD Card 
  • ~1,250 episodes of your favorite series in 1080p
  • ~200,000 songs
  • ~310,000 photos
  • ~the data on ~728,178 floppy disks
  • ~an almost infinite amount of .txt document
What do you think about the SD Card?? 

Available link for download

Read more »

Monday, February 20, 2017

HOW TO ROOT YOUR PHONE

HOW TO ROOT YOUR PHONE


ROOT YOUR ANDROID PHONE 

 SIMPLE AND NO HARM .......

FOR ANDROID PHONE WITHOUT A PC

STEP1:  Download KINGOROOT APK from the link bellow .
  • CLICK TO DOWNLOAD KINGOROOT APK 
STEP2: Open it and click on ONE CLICK ROOT OPTION .


Wait until it gets 100%

 YOUR PHONE HAS ROOTED SUCCESSFULLY .........:):):)


Available link for download

Read more »

How to Run Android OS Apps on your Windows PC

How to Run Android OS Apps on your Windows PC


How to Run Android OS & Apps on your Windows PC - Emulator is the better option to use Android on PC with Windows operating systems installed. A few years ago playing in a PC was not as easy as it is today, the games were very few most games were created as exclusive to Windows and were very costly and not talking about some kind of games that brings the time to install Windows but fortunately there were some more adventurous programmers who developed specific programs that allow run selected games which are made for different platforms including Nintendo Entertainment System and Nintendo 64 emulators for Windows and using these actions allowed to enjoy their longed games.

How to Run Android OS & Apps on your Windows PC

Emulators have got today is as a lot domestic and from time to time create good programs that allow running on various devices including that currently are trendy mobile devices and as most devices have Android operating system because a lot of programmers They have produced various projects called Android emulators for Windows operating system.

Some Android emulators present in Internet

On the Web you will find some Android emulators running on Windows as:
  • Androck (http://www.androck.co) 
  • Genymotion (https://www.genymotion.com/#!), 
  • BlueStacks (http://www.bluestacks.com), 
  • YouWave (http://youwave.com) 
  • Android SDK (https://developer.android.com/sdk) 
  • Windroy (http://www.windroye.com), 
  • Andy OS (http://www.andyroid.net) 
  • Androcontroller (http://lonamiwebs.tk/programas#ac), 
  • Firefox OS Simulator (https://addons.mozilla.org/es/firefox/addon/firefox-os-simulator).
How to install Android Emulator on Windows:
  1. You must visit to the BlueStacks http://www.bluestacks.com page and download the appropriate file from where it says "Download App Player" then down the BlueStacks-SplitInstaller_native_b file and proceed to its default installation.
  2. As Android applications run in the Windows operating system
  3. Let install correctly without making any changes press Continue.
  4. How to install an Android emulator on Windows
  5. We expect the installation process continued to do so should be capable to run properly BlueStacks.
  6. Were almost ready to enjoy the same applications we use in our mobile devices with Android in our Computer.
  7. Surely were in the emulator BlueStacks App Player as you can see is very similar to being in a Android smartphone operating system.
  8. We have created a small manual on how to install the emulator BlueStacks Windows, as I have said previously there are other matching programs that serve the same functions of a smart phone with Android but decided to make this procedure because it is the emulator that brings no complications if installing and is one of the easiest do not request some other requirements to which we have in our Computer normal mind, this type of emulator is ideal to enjoy the same Android applications here the list of applications that better use of mobile OS the most downloaded applications for Android.
Should you be interested in similar topics as How to recover removed files or documents on my hard drive, I teach how to make folders invisible, Now you can create an incorrect identity over the internet, you know who has removed the social network Facebook, with the application Unfriend Inform, Perform as yourself: How to remove the background from an image.

Available link for download

Read more »

Wednesday, February 15, 2017

How To Edit Blogger Template Using Your Phone

How To Edit Blogger Template Using Your Phone


How To Edit Blogger Template Using Your.                                  Phone.

      
   Sometimes you need to edit Blogger template when you ain’t having the computer with you. And we all know opening Blogger from web browsers like Google Chrome etc. is not at all a good way to browse the website and it becomes even worse when it comes to template editing. You need to have a high-end CPU for editing blogger templates using Google Chrome/FireFox browser in phone, because a phone with low RAM or processor will show force closes at soon as you scroll the template window down. This all happens because of CSS coding and when you remove all backspaces in CSS, then no doubts you can’t edit the template using a low end phone. It may not even work on high end phones too. 

    I needed to remove some of the html codes from my another blog, which is my personal blog, but I didn’t have my laptop with me so I opened the template page of blogger using my standby phone- Infinix hot note X551. Being a Quad-Core phone with 1 GB RAM, it still was not able to load the template window. I was using Google Chrome in it. This all happened because I merged the CSS code in one line which made it heavy for browser to display.
After searching some applications on Google Play Store and using my brains, I found out an easy way to edit Blogger template using mobile phones. The blogger template is actually in HTML format, but it in XML format when  downloaded from Blogger using Backup/Restore button. And to edit an XML file, there are many tools available on Google Play Store with some paid applications as well, but Axel is one of the application which does all the jobs easily and efficiently and makes the work easy from it’s advanced options likeDeleting, Adding, Commenting options without even cleaning the code manually.

Some Unique Features Of Axel (XML Editor / Viewer)


  • Open Source: Axel is an open source application so you can modify the source code of the application for yourself and personal use.
  • Ad free: You don’t need to use Ad blocking software in this application. Axel is a totally ad free application which doesn’t compromise with the features. There is no ‘paid’ application of this with more features.
  • Read Compressed XML files: Open simple XML files like from Blogger or from other sources. Not only you can read simple XML files, but opening compressed XML files like Android XML file (AndroidManifest.xml) or pList also known as Property list.
  • Open, Create, Save, Edit old files: The application not only edits the downloaded XML/HTML files, but it can also create and save new files as well.
  —   Validates syntax: While writing the codes, you don’t need to worry at all because the application itself will display the errors and warning messages when the wrong syntax is added.

How To Edit Blogger Templates using Axel (XML Editor / Viewer) App

Blogger image

  1. Open Blogger website using a good browser like ChromeFireFoxOpera MobileUC web browser etc.
  2. Select your blog from the blog list
On the left panel, select Template.


  • Click on Backup / Restore button which will be on top-right side.
You will see a popup having template options (upload/download). Select Download full template button to download the template from your blog.

  • Install Axel (XML Editor / Viewer) application from Google Play Store and install it in the phone. Get the application file from here.
  • After the application is successfully installed in the phone, open it.
  • Press menu button and select Open. Now select the file explorer and move to the file and tap on it to pen it using Axel application.
  • Now, you can delete, add, replace or modify the HTML/XML codes.
  • After the file has been finally edited and you’ve amended the changes in the file, you can tap on menu button once again and select Save button to save the HTML/XML file.

dont forget to place your comments so as to let me know if it really worked for you and how you are making use of it.

Available link for download

Read more »

Wednesday, January 25, 2017

How To Get 5GB Free on Your Airtel Sim

How To Get 5GB Free on Your Airtel Sim


Airtel has released the SmartSim offer since last year (2014) for old and new sims and for a particular smartphone purchased. So we blazers tweaked the previous smartphone offer and was given 1GB for the lucky tweakers and 500MB for the half lucky tweakers then they also released an awoof which when dial *141*13*50#,*141*13*100#,*141*13*200# you will be given 50 - 200MB which is still working till date for new lucky sim users.

So let me go back to the main point or topic. Airtel has now released another same offer again in a new and higher dimension from another smartphone, so before we activate this offer, we need to tweak (change) our IMEI to that smartphone which Airtel is giving the offer and immediately, you will get the Airtel blazing Free 5GB on your sim within a twinkle of an eye.

In Airtel, there are two ways to change an IMEI and they are; BY SMS and BY USING MTK ENGINEERING. Well, by SMS is a little bit stressful because you will have patience when tweaking with SMS or else you will give up after receiving different unnecessary messages from Airtel so if your phone support mediatek, you dont have to waste time kindly use MTK ENGINEERING for the tweaking.

How To Activate Airtel Free 5GB SMARTSIM Offer

Tweak This Imei 861143032309490 using MTK Engineering.
Make sure you use IMEI analyzer to analyze those last 4digits to your own and after you have gotten your own analyzed IMEI, kindly tweak your IMEI using MTK ENGINEERING and send JOIN to 141 and immediately, you will receive a text message saying;


You have been rewarded 5GB for 30days on activation of the Airtel Data Terminal.
Then you can check your data bundle by dialing *140# and it will display to you. As shown below;
Airtel 5GB Free
There is an easier method using SMS.
This way is simple but you need patience and do it diligently not in a hurry. You have to;


  • Enter your text message 
  • Send "S" IMEI to 232 e.g S861143032390649 to 232
  • Then you will receive "Your phone is not provisional", kindly send JOIN to 141 immediately.
  • Then you will receive your Blazing 5GB data in this format " You have been rewarded 5GB for 30days on activation of the Airtel Data Terminal. ".
  • Then start blazing with your data.
You can check your data by dialling *140# and start Blazing!
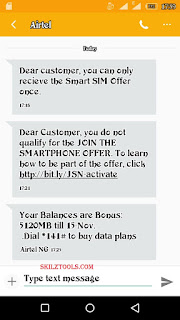
NOTE: In this method of using SMS to tweak, you will have to analyze the IMEI also. When you tweak your IMEI using SMS method, you might receive "Dear customer, you cannot activate this offer twice" it means your IMEI is getting closer kindly analyze the IMEI again and if you receive "Dear customer, you are not qualify for the smartphone offer" kindly change the 4digits entirely and tweak it again.

Is it helpful? Do you encounter any problems or issues while trying to set this up kindly ask more questions and if it works for you kindly share your experience!

Available link for download

Read more »

Thursday, January 19, 2017

How To Fund Your Bitcoin Wallet In Nigeria Without Getting Scammed

How To Fund Your Bitcoin Wallet In Nigeria Without Getting Scammed


Now that you might have known  http://pinkberrylicious.blogspot.com /2016/10/how-to-create-bitcoin-wallet.html" target="_blank">how to create a Bitcoin Wallet for free, the next thing that should start coming into your mind is how to fund it without getting burnt by scammers out there.

Actually, creating a Bitcoin wallet is one thing, and getting fund into it is another thing; at least we believe that you will want to make use of your Bitcoin wallet for possible transactions and that was why you created it at the first place.

Creating Bitcoin wallet and doing nothing else with it can be likened to opening a bank account and operating it with zero balance, and hence almost worthless.

The easiest method and the most ways people fund their Bitcoin wallet is by obtaining funds from Bitcoin exchangers.
how-to-fund-bitcoin-wallet

And thus, since most Bitcoin exchange transactions are being done online, choosing the right Bitcoin exchanger in Nigeria should be paramount to any Bitcoin account holder that intends funding his/her Bitcoin wallet.

And off course, nobody likes getting ripped off of his/her own hard earned cash. Now permit me to preach a little here;

‘Just like the Bible described an enemy as a roaring lion always moving around and seeking for  whom to devour’, many internet Bitcoin exchanger scammers are also moving around on the internet like an adversary, constantly seeking for whom to prey upon.

Since we are completely against any form of online scam, we are going to be using this medium to show you how to fund your Bitcoin wallet in Nigeria, without getting scammed.

Must Read:  http://pinkberrylicious.blogspot.com /2014/08/6-things-you-must-know-about-bitcoin.html" style="font-family: Arial, Helvetica, sans-serif;" target="_blank">6 important things you should endeavour to know before carrying out any Bitcoin transaction

Follow us right away below through the processes of funding your Bitcoin wallet without telling stories that touch the heart, body and soul;

Requirements to funding your Bitcoin wallet

 Bitcoin Address

 Scam free Bitcoin exchanger

Procedure proper

 Log into your Bitcoin account on Blockchain with your wallet ID and password

•  After successful login, click on the wallet menu

 You will see two large buttons displaying Send and Receive

 Click on the Receive button and an address will automatically be generated for you – the address looks something like this 17ax9KilJMogjNYoPddxcrDdTyH and most times starts with the digit 1

 Go to Naira4dollar Bitcoin exchanger and register a free account with them

 On Naira4dollar create a Bitcoin Buy request, and fill in the amount of Bitcoin you will want to buy from them

•  Copy and supply your Bitcoin generated address indicated in similar fashion above on the space provided for it on Naira4dollar; as it is with the address that you will use to receive funds into your Bitcoin wallet, the moment Naira4dollar sends out your fund

 Complete your Buy transaction on Naira4dollar by paying into their bank account with the Naira equivalent of the amount of Bitcoin you want to purchase.

 Notify Naira4dollar with your payment details, using the send Alert feature on their platform

  Finally wait for Naira4dollar to credit your Bitcoin wallet – note that sometimes it can take time for them to fund your wallet, but just be patient with them and be rest assured that Naira4dollar will credit your Bitcoin wallet if you submit the appropriate details.

Precautions Often Worth Taking!

 Always make sure that you copy your right bitcoin address when supplying  it for funding, for it is like your account number

 After every successful transaction with a Bitcoin address, another different address is often generated in your Bitcoin wallet, when you request for it; therefore always endeavour to use a new address in any subsequent transactions receive fund transaction.

Hurray! You have just succeeded in funding your Bitcoin wallet without getting scammed.

Available link for download

Read more »